> ## Documentation Index
> Fetch the complete documentation index at: https://docs.hiddenlayer.ai/llms.txt
> Use this file to discover all available pages before exploring further.
# Models
The Models page displays an at-a-glance aggregation of all imported AI Models. Each AI model is visually represented as a Model Card showing critical information such as name, model ID, tags, and active model versions. Your uploaded model card can be viewed in detail to analyze it for any security risks and provide scans to expose findings, including recommendations for fixing any issues and improving the model's security posture.
1. Your AI models are displayed within the Models page.
 2. The Models page lets you quickly view your AI Models, Model ID’s, AI model versions, and associated tags.
* **Model ID** - A unique identifier for the model.
* **Supply Chain** - Supply Chain analyzes Machine Learning Models to identify hidden cybersecurity risks and threats such as malware, vulnerabilities, and integrity issues.
* **Compliant** - Depending on Policy settings, files are marked as Compliant or Noncompliant. See [Supply Chain Policy](./supply_chain_policy) for more information.
* If there is an asterisk (\*), this means the model scan was manually set to **Compliant** or **Noncompliant**.
* **Created on** - Date model was added.
* **Last Scan** - Date model was last scanned.
* **Tags** - The version number associated with an individual ML model.
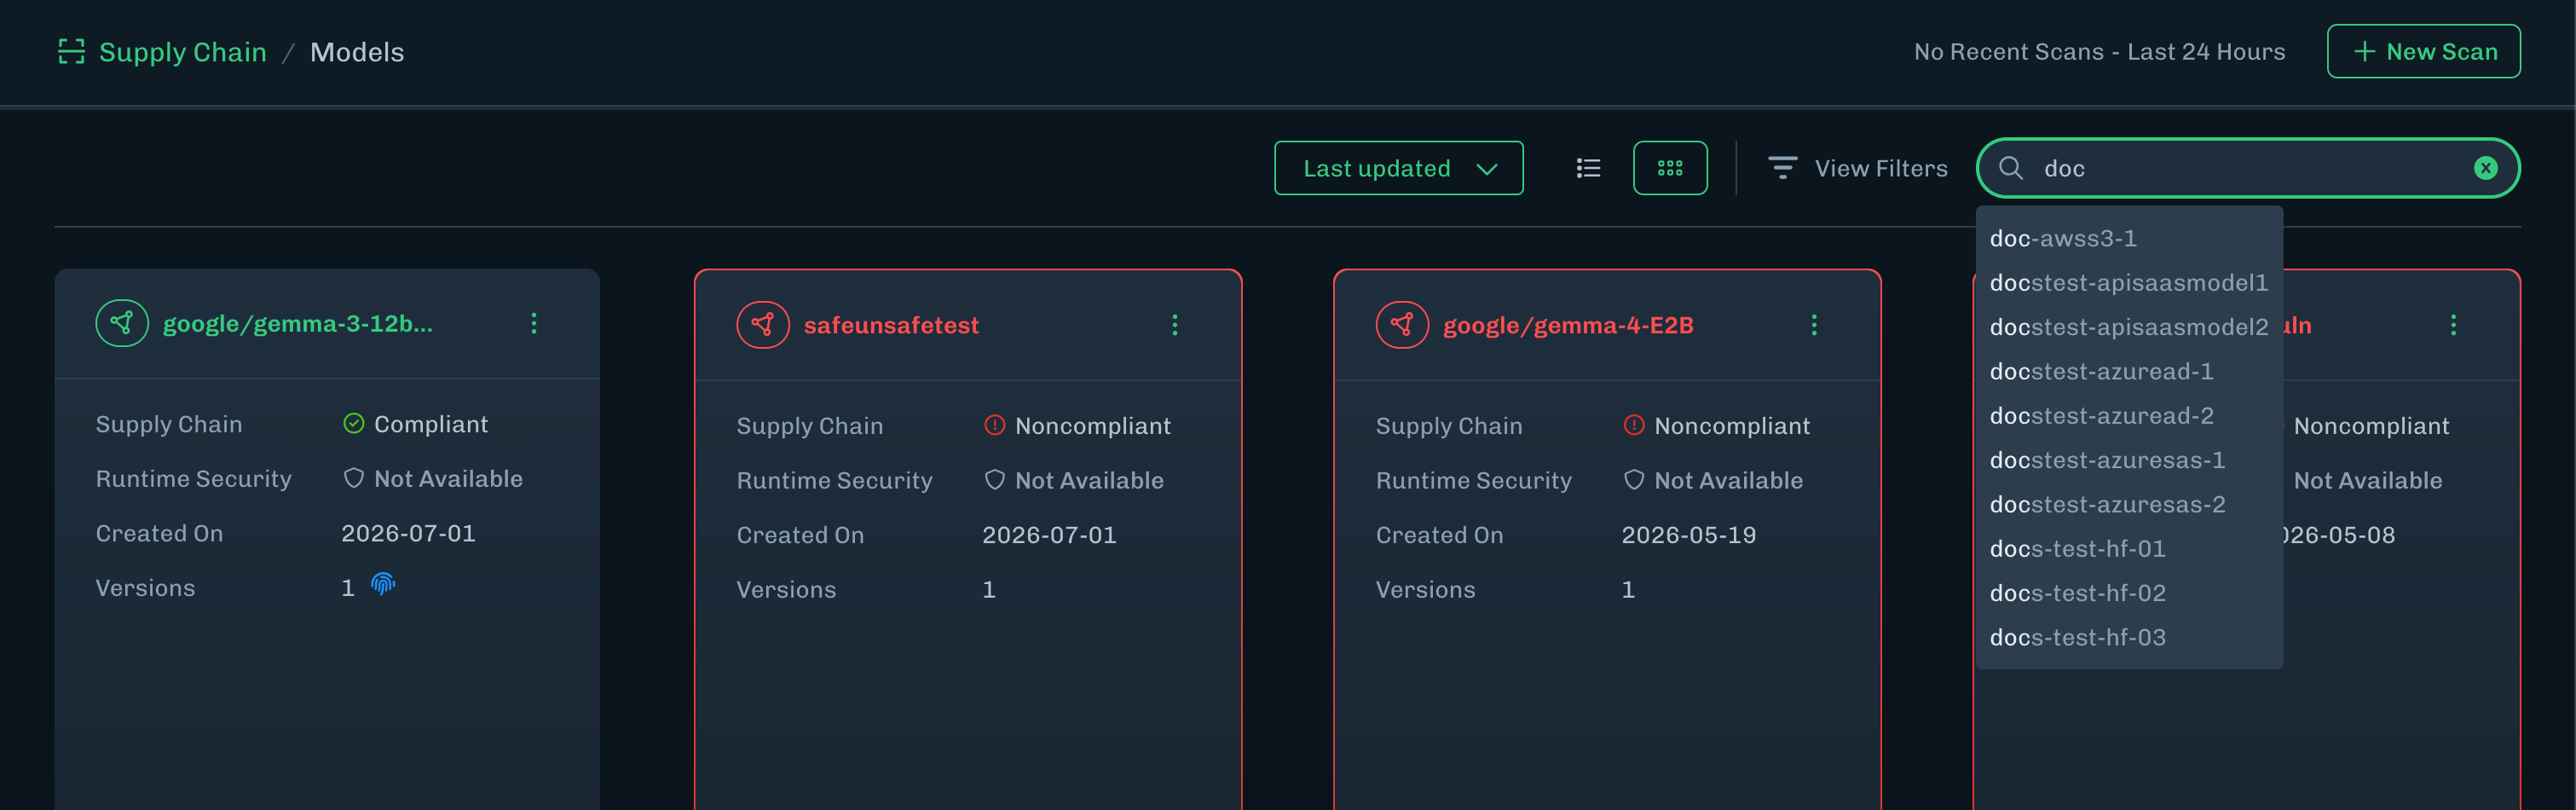
3. Use the Search field to search for models by name.
* Enter at least three characters to enable the type-ahead search feature.
* The search results are all models with the characters or keyword appearing anywhere within the model’s name.
* Select a model from the search results list or press Enter to view all models based on the search results.
2. The Models page lets you quickly view your AI Models, Model ID’s, AI model versions, and associated tags.
* **Model ID** - A unique identifier for the model.
* **Supply Chain** - Supply Chain analyzes Machine Learning Models to identify hidden cybersecurity risks and threats such as malware, vulnerabilities, and integrity issues.
* **Compliant** - Depending on Policy settings, files are marked as Compliant or Noncompliant. See [Supply Chain Policy](./supply_chain_policy) for more information.
* If there is an asterisk (\*), this means the model scan was manually set to **Compliant** or **Noncompliant**.
* **Created on** - Date model was added.
* **Last Scan** - Date model was last scanned.
* **Tags** - The version number associated with an individual ML model.
3. Use the Search field to search for models by name.
* Enter at least three characters to enable the type-ahead search feature.
* The search results are all models with the characters or keyword appearing anywhere within the model’s name.
* Select a model from the search results list or press Enter to view all models based on the search results.
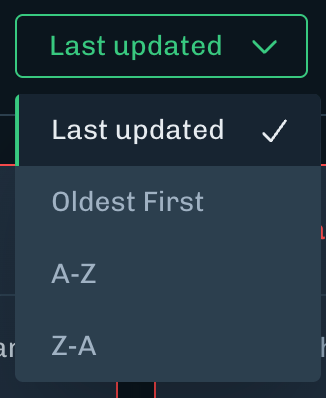
 4. Use the Sort feature to sort the models by: Newest to Oldest, Oldest to Newest, A-Z, or Z-A.
 5. In many cases there are multiple pages of models. Click on the green arrow of a card to view the model details. Based on your preferences, models are switchable to the card or list view, and by model count by page.
## Model Tags
**Early Access**
The Model Tags feature is Early Access. Ask your HiddenLayer representative for more information.
Create a key-value pair tag and apply it to your Model Cards. You can filter the models using the tag. Create tags that suits your organization's needs.
**Example**
* Create a tag `release : blocked`.
* Apply the tag to the appropriate model cards.
* Filter using this tag to find all models that are blocked.
### Add a Tag
1. In the Console, go to **Supply Chain > Models**.
2. Find a model card to add a tag to.
3. Click **Add Tags**.
* If the model card has an existing tag, then click the edit icon (pencil icon).
4. In the **Search tags** field, type the first value, then press Enter. Example: **release**.
5. Type the second value, then press Enter. This adds the key-value pair to the Edit Tags window. Example: **blocked**. **Note**: This does not apply the tag to the model card.
6. Add as many tags as needed.
7. Click **Save Changes** to add these tags to the model card.
### Remove a Tag
1. In the Console, go to **Supply Chain > Models**.
2. Find a model card to remove a tag to.
3. Click the edit icon (pencil icon). The Edit Tags window displays. The tags applied to the model card display below the **Search tags** field.
4. For the tag you want to remove, click the `x` for that tag.
5. Click **Save Changes**.
## Search Models
You can search for models on the Model Inventory page. This helps you find a model using a keyword search.
* Enter at least three characters and the search will filter the models.
* The search results are all models with the characters or keyword appearing anywhere within the model’s name.
* Select a model from the search results list or press Enter to view all models based on the search results.
### Search Filters
You can apply filters to the Models page to find models by a filter type.
1. On the Models page, click **View Filters**.
5. In many cases there are multiple pages of models. Click on the green arrow of a card to view the model details. Based on your preferences, models are switchable to the card or list view, and by model count by page.
## Model Tags
**Early Access**
The Model Tags feature is Early Access. Ask your HiddenLayer representative for more information.
Create a key-value pair tag and apply it to your Model Cards. You can filter the models using the tag. Create tags that suits your organization's needs.
**Example**
* Create a tag `release : blocked`.
* Apply the tag to the appropriate model cards.
* Filter using this tag to find all models that are blocked.
### Add a Tag
1. In the Console, go to **Supply Chain > Models**.
2. Find a model card to add a tag to.
3. Click **Add Tags**.
* If the model card has an existing tag, then click the edit icon (pencil icon).
4. In the **Search tags** field, type the first value, then press Enter. Example: **release**.
5. Type the second value, then press Enter. This adds the key-value pair to the Edit Tags window. Example: **blocked**. **Note**: This does not apply the tag to the model card.
6. Add as many tags as needed.
7. Click **Save Changes** to add these tags to the model card.
### Remove a Tag
1. In the Console, go to **Supply Chain > Models**.
2. Find a model card to remove a tag to.
3. Click the edit icon (pencil icon). The Edit Tags window displays. The tags applied to the model card display below the **Search tags** field.
4. For the tag you want to remove, click the `x` for that tag.
5. Click **Save Changes**.
## Search Models
You can search for models on the Model Inventory page. This helps you find a model using a keyword search.
* Enter at least three characters and the search will filter the models.
* The search results are all models with the characters or keyword appearing anywhere within the model’s name.
* Select a model from the search results list or press Enter to view all models based on the search results.
### Search Filters
You can apply filters to the Models page to find models by a filter type.
1. On the Models page, click **View Filters**.
 2. Select the filters you want to apply.
* For Supply Chain or Runtime Security, select the severity level.
* For **Date Created**, select a start and end date.
* For Service Provider, you can select **Local**.
2. Select the filters you want to apply.
* For Supply Chain or Runtime Security, select the severity level.
* For **Date Created**, select a start and end date.
* For Service Provider, you can select **Local**.
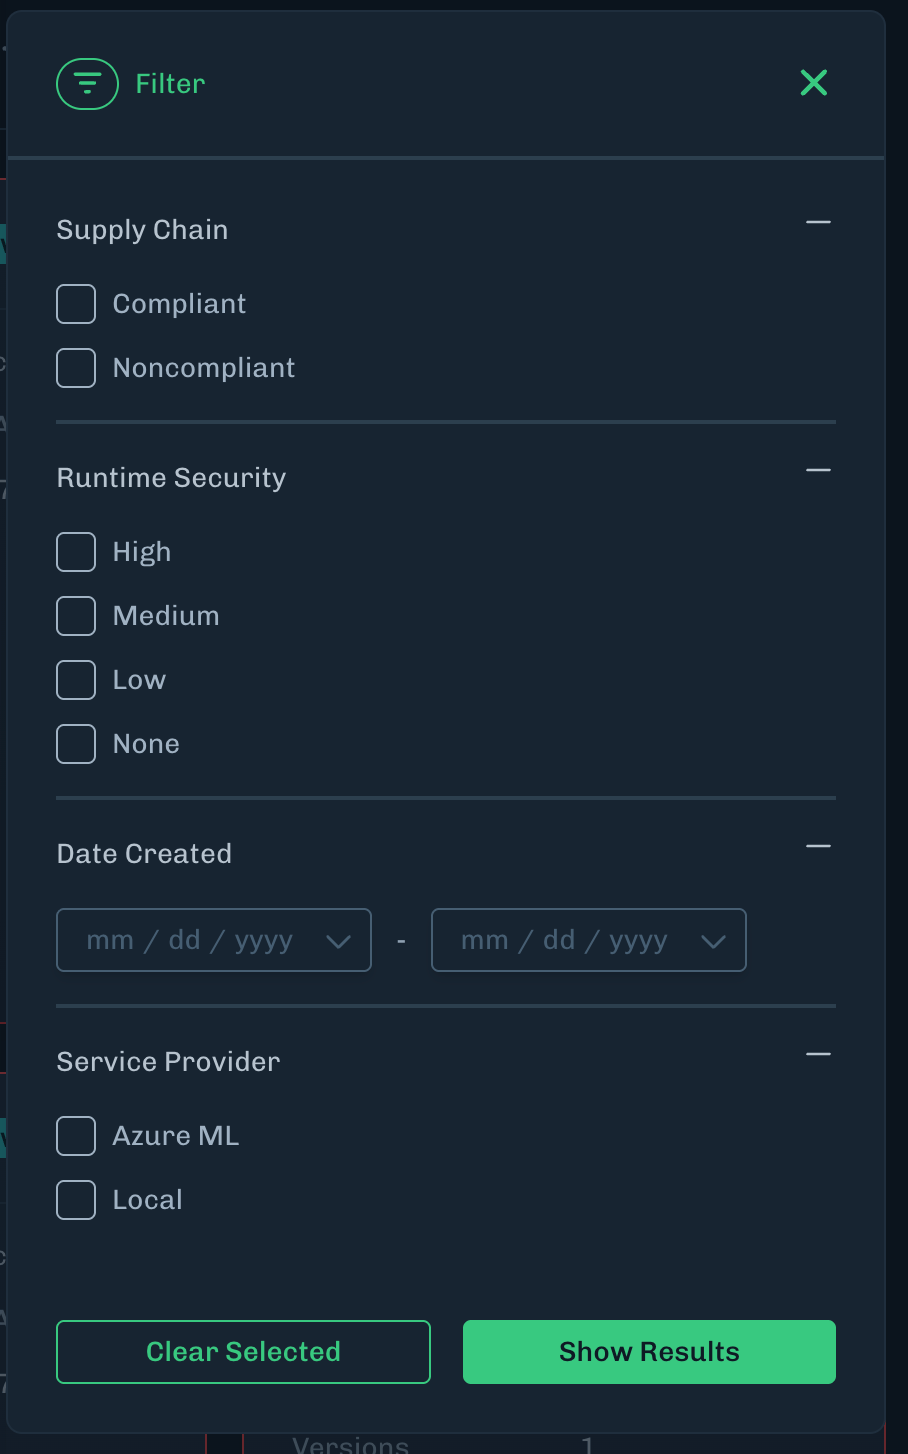 3. Click **Show Results**.
* To clear the selected filters, click **Clear Selected**.
## Delete Model Card
Deleting model cards that are no longer needed reduces the number of cards to search through and helps you focus on what is important.
**Model Card View**
The Models page must be in Model Card view to delete a card.
1. In the Console, go to the Models page.
2. Click the menu (three vertical dots) for the model card you want to delete.
3. Click **Show Results**.
* To clear the selected filters, click **Clear Selected**.
## Delete Model Card
Deleting model cards that are no longer needed reduces the number of cards to search through and helps you focus on what is important.
**Model Card View**
The Models page must be in Model Card view to delete a card.
1. In the Console, go to the Models page.
2. Click the menu (three vertical dots) for the model card you want to delete.
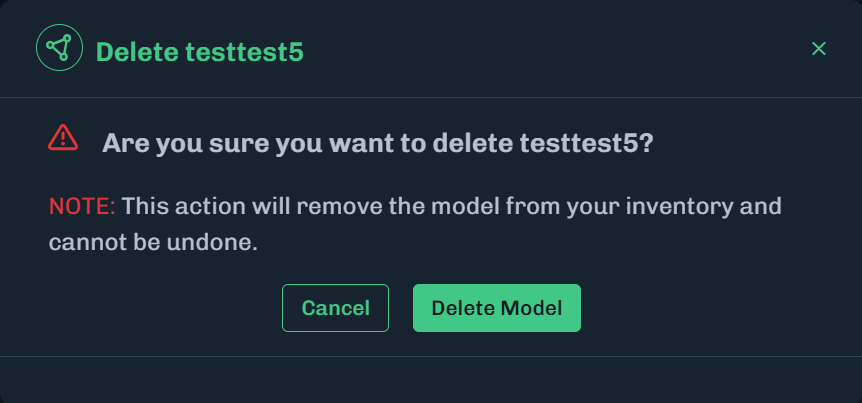
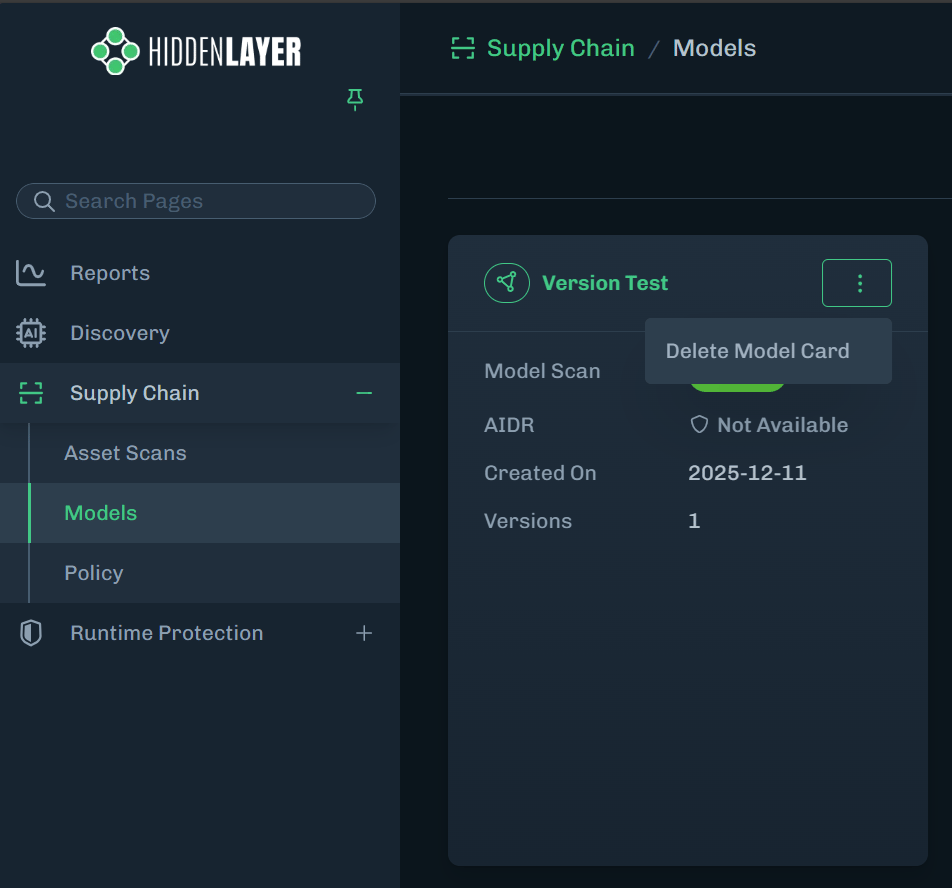 3. Click **Delete Model Card**. A message displays, asking you to confirm the deletion.
4. Click **Delete Model**.
3. Click **Delete Model Card**. A message displays, asking you to confirm the deletion.
4. Click **Delete Model**.